 Ferndale
 Lummi Island's Climate Puts Extra Stress on Exterior Siding
Lummi Island sits out in the water, which is exactly why homes there wear out siding faster than a comparable house a few miles inland in Ferndale or Bellingham. Being surrounded by the Salish Sea means near-constant exposure to salt-laden air, wind-driven rain that comes in sideways off open water during winter storms, and a damp season that stretches long enough for moss and algae to get a real foothold on north- and shade-facing walls. None of this is unique to any one house on the island — it's the baseline every exterior surface out there has to deal with, year after year.
Whatcom County as a whole gets plenty of rain, but island and shoreline properties take a different kind of beating than a house set back in a wooded lot on the mainland. Salt air is corrosive in ways plain rain isn't, and it doesn't rinse off on its own the way road grime does. Add in wind exposure with fewer windbreaks than an inland lot, and you've got a wall system that needs to be built and installed correctly the first time — because redoing it later, on an island, is a lot more disruptive than it would be on a standard in-town job.
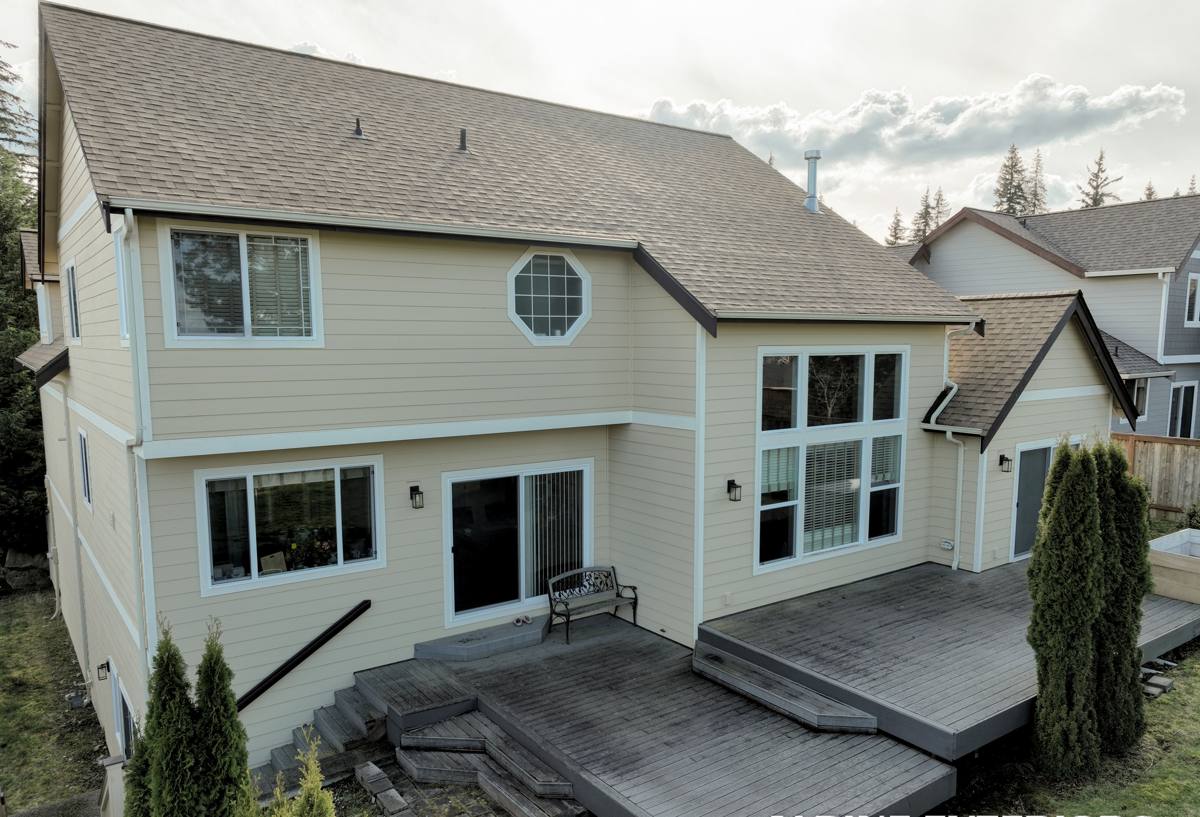
What Salt Air and Driving Rain Actually Do to a Wall System
The damage isn't dramatic or sudden — it's cumulative, and it shows up in predictable places if the siding and the details behind it weren't suited to the exposure:
- Fastener and trim corrosion: Standard fasteners and unprotected metal trim pit and streak faster in salt air than they would a few miles inland.
- Moisture intrusion behind the cladding: Wind-driven rain finds any gap in the house wrap, flashing, or caulk joints and pushes water in rather than letting gravity carry it down and off.
- Finish breakdown on painted wood or lower-grade composites: UV plus salt air accelerates fading and chalking on anything that relies on a field-applied paint job rather than a factory-cured finish.
- Persistent moss and algae: Shaded, damp walls hold moisture longer through the fall and winter, and once moss establishes itself it keeps the substrate wetter than it should be.
None of these are reasons to avoid siding a house on the island — they're the reasons the product and the installation details matter more here than they would somewhere drier.
Why We Install Only James Hardie Fiber Cement on Homes Like These
We standardized on James Hardie fiber cement across the board, and marine-exposure jobs like Lummi Island are a big part of why. Hardie's HZ5 product line is climate-engineered for regions with more moisture and freeze-thaw cycling — the Pacific Northwest is exactly the kind of climate that formulation was built for. Fiber cement itself is non-combustible and dimensionally stable, so it doesn't swell, cup, or crack the way wood-based products can when they take on repeated wetting and drying. The ColorPlus factory finish is baked on under controlled conditions rather than brushed on at the job site, which matters a lot in salt air — it holds color and resists chalking far longer than a field-applied coat.
We don't install vinyl, LP SmartSide, Cemplank, Allura, primed spruce, or cedar, and we're upfront about why. Each of those products has legitimate uses and reasonable manufacturers behind it. But for the specific combination of salt exposure, wind-driven rain, and a long wet season that Lummi Island homes deal with, we've settled on one system we trust to be installed to spec every time, backed by a manufacturer warranty that transfers with the house.
| Factor | James Hardie Fiber Cement | Vinyl | Wood / Engineered Wood |
|---|---|---|---|
| Behavior in wind-driven rain | Stable, non-absorbent core | Can flex/gap at panels in high wind | Absorbs moisture at cut edges and joints |
| Salt air / coastal finish life | Factory-cured ColorPlus finish | Color can fade and become brittle | Field-applied paint breaks down faster |
| Fire rating | Non-combustible | Combustible | Combustible |
| Warranty structure | Long-term, transferable | Varies by manufacturer | Often limited or workmanship-only |
What a Correct Fiber Cement Installation Requires Out Here
Drainage Planes and Flashing Details
On a wall that regularly takes wind-driven rain, the siding itself is really the second line of defense. The house wrap, flashing at every window and door, and a proper drainage plane behind the cladding are what actually keep bulk water from reaching the sheathing. We pay close attention to head flashing, kick-out flashing at roof-wall intersections, and proper laps in the weather-resistive barrier — details that matter on any job but that get exposed fast on a house that faces open water.
Fasteners and Trim in a Marine Environment
We use fasteners and trim components suited to the corrosion risk rather than whatever is cheapest to source. Clearances from grade, decks, and roof lines are held to Hardie's published specs, because tight clearances trap moisture against the bottom of the siding and that's exactly where salt-air corrosion and moss growth start first.
Caulking and Field Touch-Up
Joints and cut ends get sealed and any cut edges are primed before caulking, so the factory finish isn't compromised at the one spot where it's most vulnerable — the field cut.
The Logistics of Doing an Island Job Right
Working on Lummi Island isn't the same as working a job in town, and it changes how we plan the project before a single board goes up. Access is by ferry, with a limited number of crossings a day, so material deliveries and crew schedules have to be planned around that rather than around a normal drive-to-the-jobsite routine. We stage materials to arrive complete rather than making multiple partial trips, and we build weather windows into the schedule with some margin, since a missed crossing or a delayed delivery costs more time on an island job than it would on the mainland.
A crew that hasn't worked the island before tends to underestimate this — they price the labor the same as an in-town job and then either eat the extra time or cut corners on scheduling to make up for it. We build the logistics into the plan up front instead of discovering it mid-project.
Our Process, Site Visit to Finished Wall
- Site assessment: We look at wall exposure, existing moisture damage, trim condition, and how much of the house faces open water versus a more sheltered elevation.
- Product and color selection: We walk through the HardiePlank and HardiePanel options in the HZ5 line and the ColorPlus palette, matched to what holds up best on the exposed elevations.
- Scheduling around ferry and weather: Material delivery and crew days are planned as a block rather than piecemeal trips.
- Tear-off and prep: Old siding comes off, sheathing is checked for hidden moisture damage before anything new goes on, and house wrap and flashing are installed or corrected.
- Installation: Siding is fastened, clearanced, and caulked to Hardie's specifications, with attention to the joints and penetrations that matter most in driving rain.
- Final walkthrough: We check trim lines, caulk joints, and touch-up work before calling the job done.
Living With Fiber Cement Siding in a Salty, Moss-Prone Climate
Fiber cement is low-maintenance compared to painted wood, but "low-maintenance" doesn't mean "no maintenance" — especially this close to the water. A little seasonal attention goes a long way toward getting the full lifespan out of the siding and the trim around it.
- Rinse salt film off the exterior periodically, especially on walls that face open water directly.
- Keep shrubs and trees trimmed back from the walls so shaded sections get airflow and dry out between rains.
- Check for moss or algae starting on north-facing or shaded walls and address it early, before it holds moisture against the surface for months.
- Inspect caulk joints annually, particularly around windows, doors, and trim — this is where small failures show up first.
- Touch up any scratches or chips in the ColorPlus finish promptly so bare cut edges aren't left exposed.
What Lummi Island Siding Projects Typically Involve
Every house is different, but these are the factors that usually move the scope and cost of a project on the island:
| Factor | Why It Matters Here |
|---|---|
| Home size and elevation exposure | Walls facing open water often need extra attention to flashing and drainage detail |
| Condition of existing siding and sheathing | Hidden moisture damage from prior wind-driven rain exposure sometimes surfaces at tear-off |
| Trim, soffit, and fascia scope | Salt-air corrosion often affects trim and metal components before the siding itself |
| Color and texture selection | Some ColorPlus finishes and textures hold up visibly better on heavily exposed elevations |
| Ferry and scheduling logistics | Material delivery and crew time need to be planned as efficient blocks rather than daily back-and-forth trips |
Why a Crew That Already Works Lummi Island Matters
A lot of what makes an island siding job go well happens before the first board is cut: knowing how to plan around the ferry, knowing what kind of moisture damage to expect when old siding comes off a water-facing wall, and having the flashing and clearance details already dialed in for a marine environment rather than figuring it out on the fly. A crew that's done this before on Lummi Island doesn't have to relearn those lessons on your house. That familiarity is part of what keeps a project on schedule and keeps the finished wall performing the way it's supposed to for years after the crew leaves.
If you're weighing a siding project on Lummi Island or anywhere else in the Ferndale area, we're glad to walk the property with you, talk through what your specific exposure calls for, and put together a straightforward, no-pressure estimate using the free estimate form below.